
In this article, I will show you how you can get awesome Ubuntu fonts on your Deepin OS setup. To me, Ubuntu fonts look way better than the default fonts of Deepin OS, hope you will like it too.
Prerequisites
- sudo / root user
Step 1 – Download and Extract Ubuntu Font Family
wget https://assets.ubuntu.com/v1/fad7939b-ubuntu-font-family-0.83.zip; unzip fad7939b-ubuntu-font-family-0.83.zipStep 2 – Install Ubuntu Font Family
rm -rf ubuntu-font-family-0.83/*txt; mv ubuntu-font-family-0.83 ubuntu; cp -r ubuntu /usr/share/fonts/truetypeStep 3 – Remove Unnecessary Files
rm -rf fad7939b-ubuntu-font-family-0.83.zip; rm -rf ubuntuStep 4 – Select Ubuntu Font
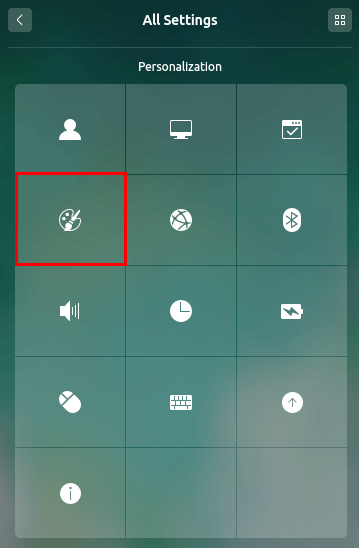
From Control Center click on “Personalization”
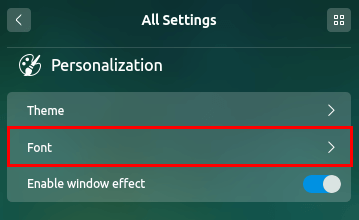
then you should see the “Font” settings options like below, click on it
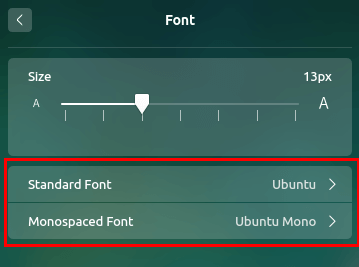
then select “Ubuntu” from the list for “Standard Font” and “Ubuntu Mono” from the list for “Monospaced Font” –
and finally, you should see Ubuntu font styles everywhere in your Deepin OS setup.
I hope this will work without any issue for you, in case you face any issue don’t hesitate to post a comment here.
Thanks for reading this article.